
Community of Kindness
- rhiannonruffner
- Nov 4, 2020
- 2 min read
Updated: Nov 11, 2020
Big Idea
Incorporating kindness into daily life
Working together to make the world a kinder place
Lesson Overview
Students will read the book Be Kind by Pat Zietlow and learn about all different ways they can be kind in their own lives. The class will discuss what kindness means to them and places they find it within their community. Looking at Ana Serrano’s work, students will observe how these places and kindness examples can be brought to life through a three-dimensional sculpture of their place of kindness. After brainstorming, students will create their own building using cardboard and other found materials that will bring kindness into the classes community. Once each students building is complete, we will incorporate them all together, creating a classroom community of kindness, similar to Ana Serrano’s, Cartonlandia.
Reading Book
Be Kind by Pat Zietlow Miler & Illustrated by Jen Hill
Artist Inspiration

Ana Serrano
Cartonlandia, 2008
62 x 64 x 62 in, cardboard, paper, acrylic, inkjet prints, acrylic, balsa wood
Mexican American artist Ana Serrano incorporates beliefs, practices, and behaviors of people in their neighborhoods. Cartonlandia is full of life and the bright colors connect to her Mexican culture while capturing the accessibility of materials.
List of Materials
The items listed below are just ideas of materials that can be used. This project has a focus on accessible materials, so utilize any materials you have to create your building. Don’t forget to be creative!

Cardboard
Scissors
Liquid & Stick Glue
Hot Glue Gun
Exact-O Knife
Construction Paper
Rubber Cement
Markers
Paint
Paint Brushes
Recycled Materials
Found Objects
Art-Making Process

Step 1: Brainstorm & Plan
After many sketches, I decided on a building design for my Give & Take Art Space. Within this planning process, I figured out the use for the building, what it provides and incorporated this reasoning into the design. To prepare for the next step of cutting the cardboard, I planned the measurements as well.
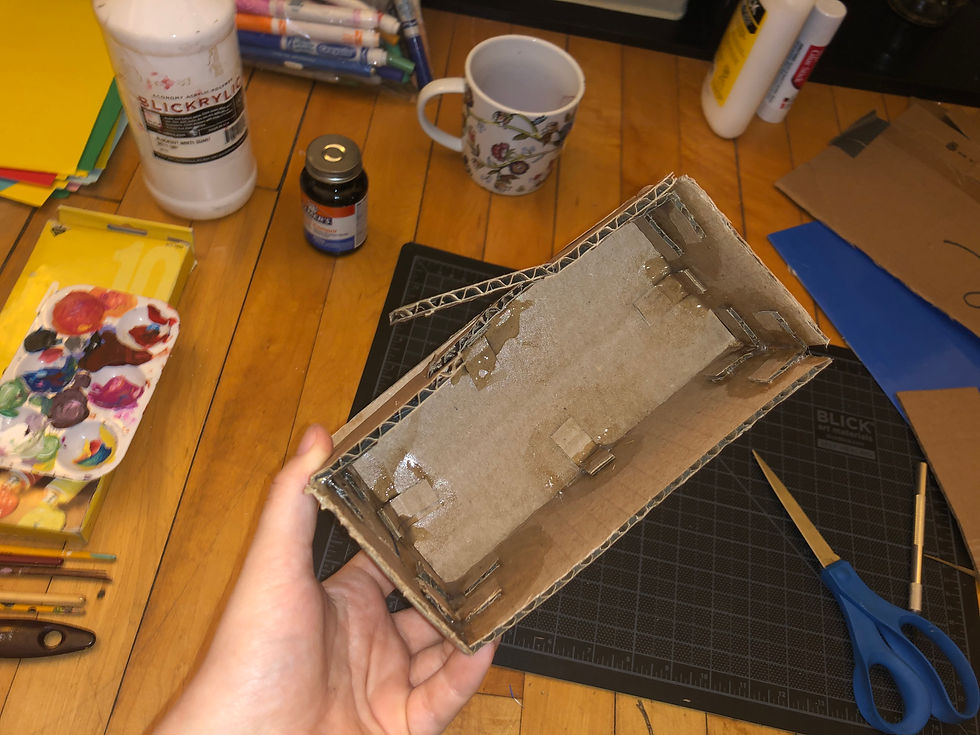
Step 2: Measure & Build
I used my model sketch to measure and cut the correct sizes for the walls. I then incorporated the tab connecting technique with rubber cement to secure my buildings foundation.

Step 3: Color & Design
After allowing the glue to dry, I began to incorporate the design of the "on-going collaborative mural" on the outside walls. I also started adding color onto the smiley face door and introduced the name of my building.

Step 4: Multimedia & Creativity
Once the design is down, start to get creative and use supplies you find within your home. Here I used construction paper and acrylic paint to create the colorful roof.

Step 5: Final Touches
These are after the final touches were made. I added the face to the door, and added an in-process mural to add color and to the idea of community collaborative work being done.
Demonstration Video
3D Cardboard Sculpture Techniques


Comments